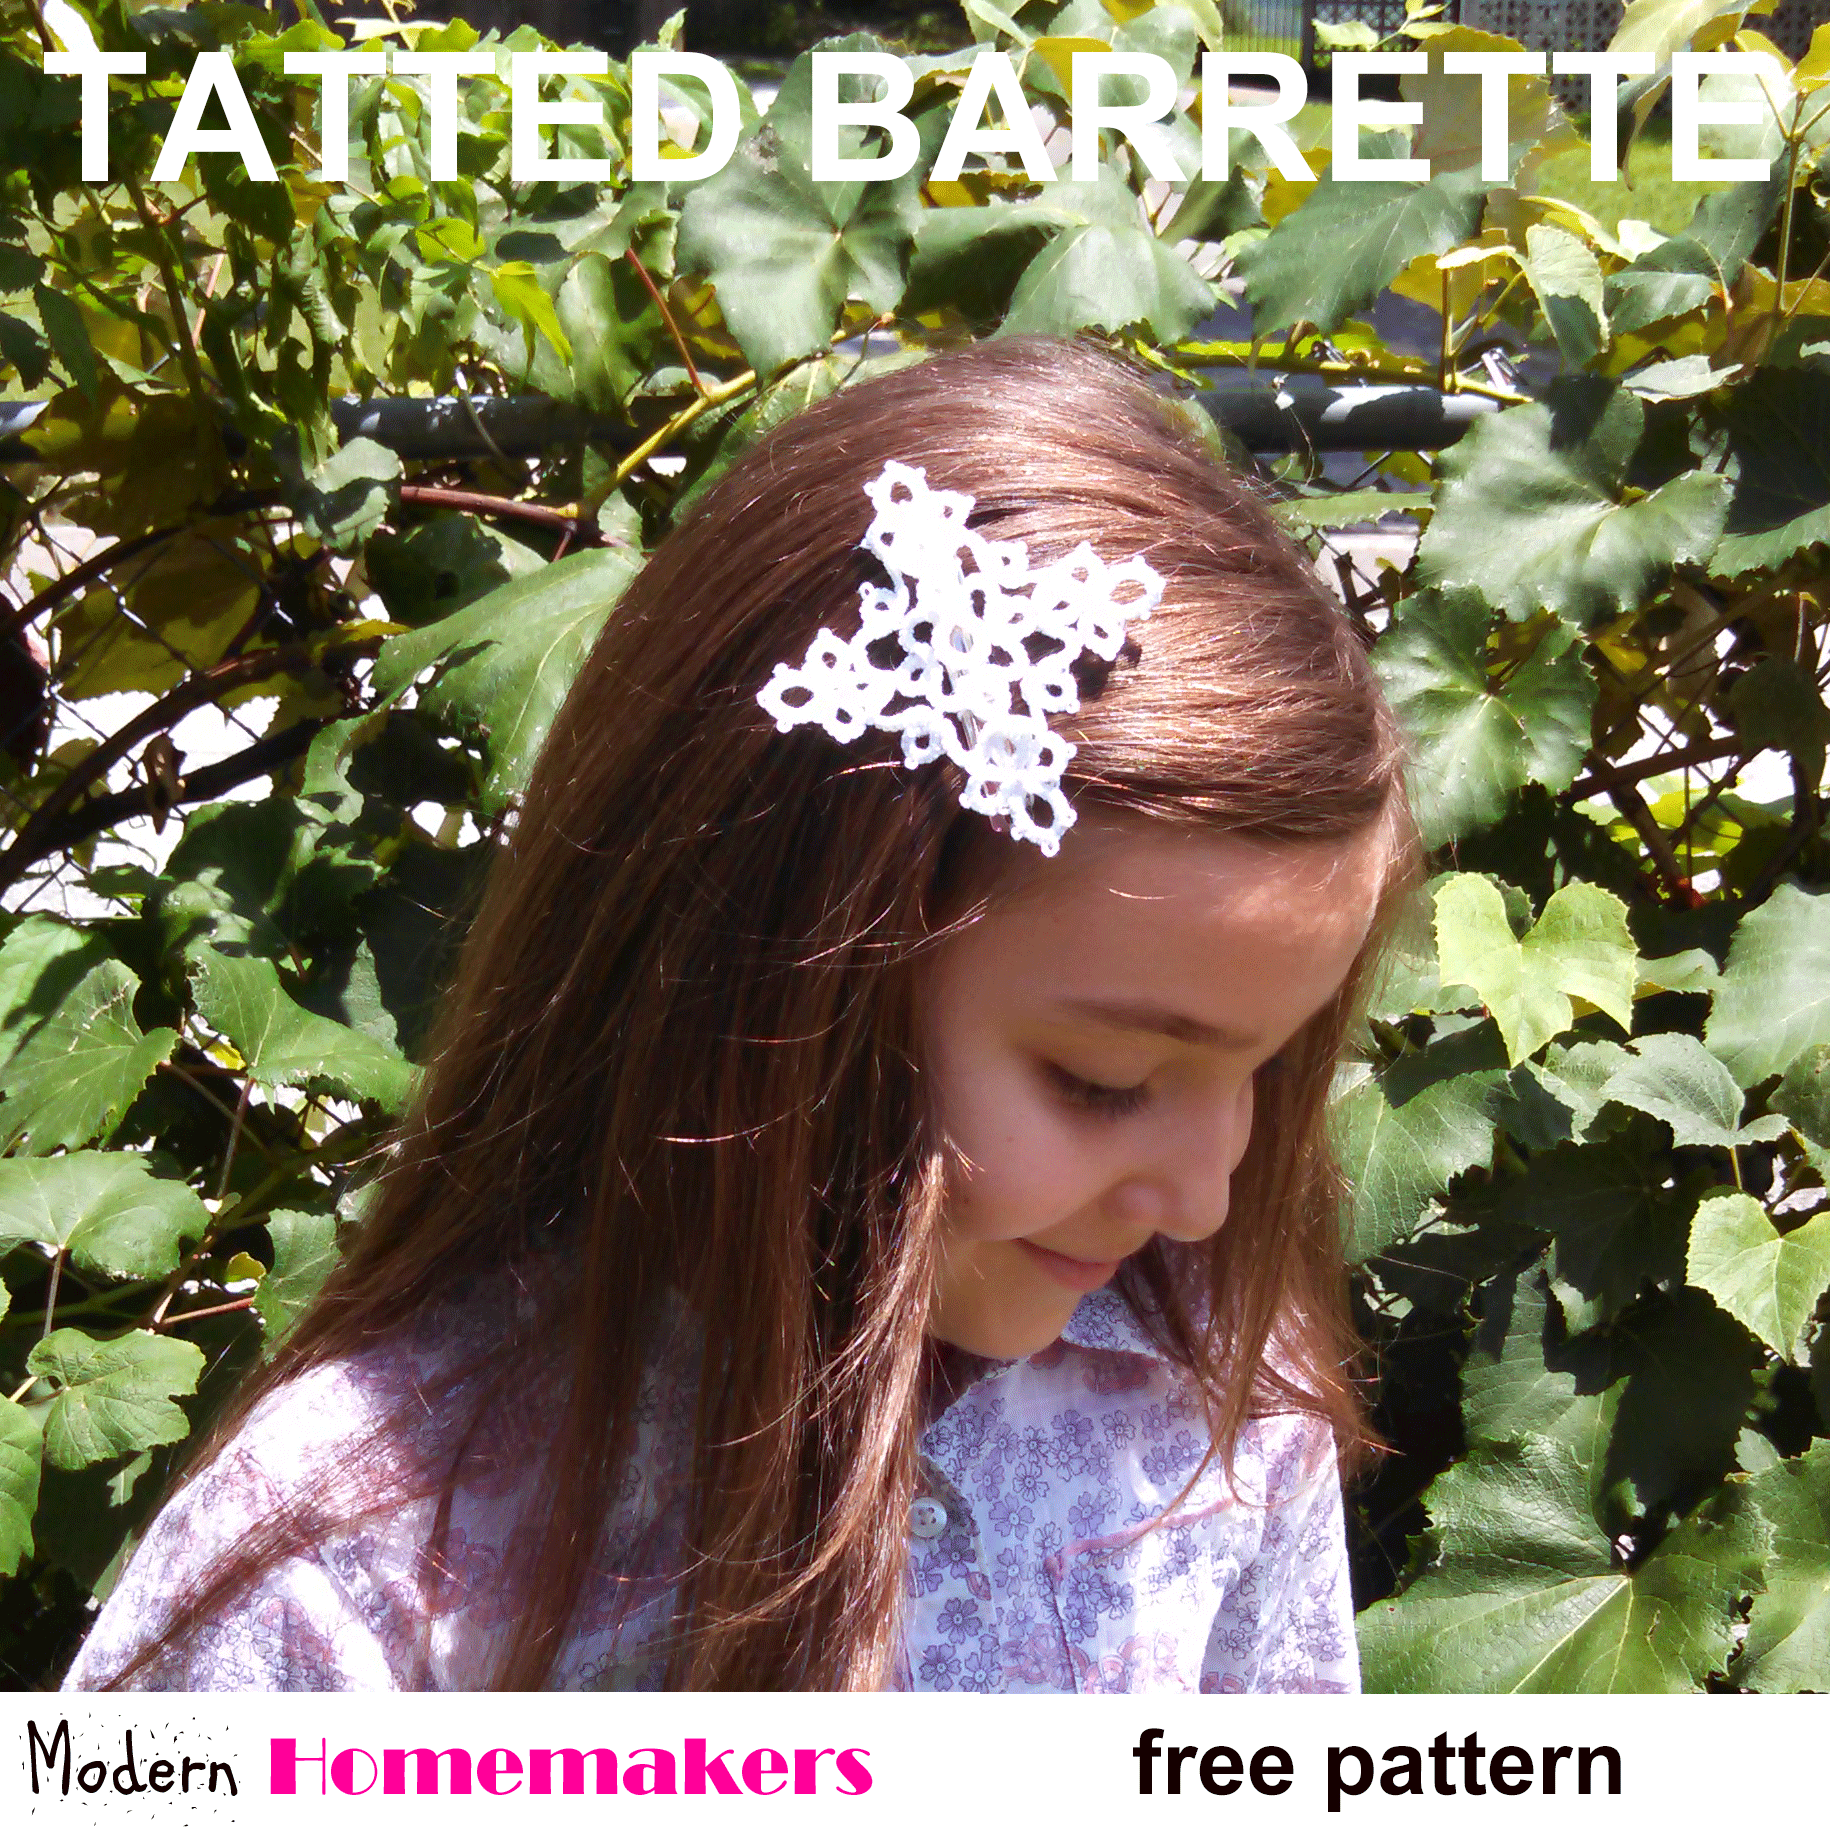
Tatting Instructions For Barrette
 Summer is about over which means it’s time to start buying or making hair things for the new school year.
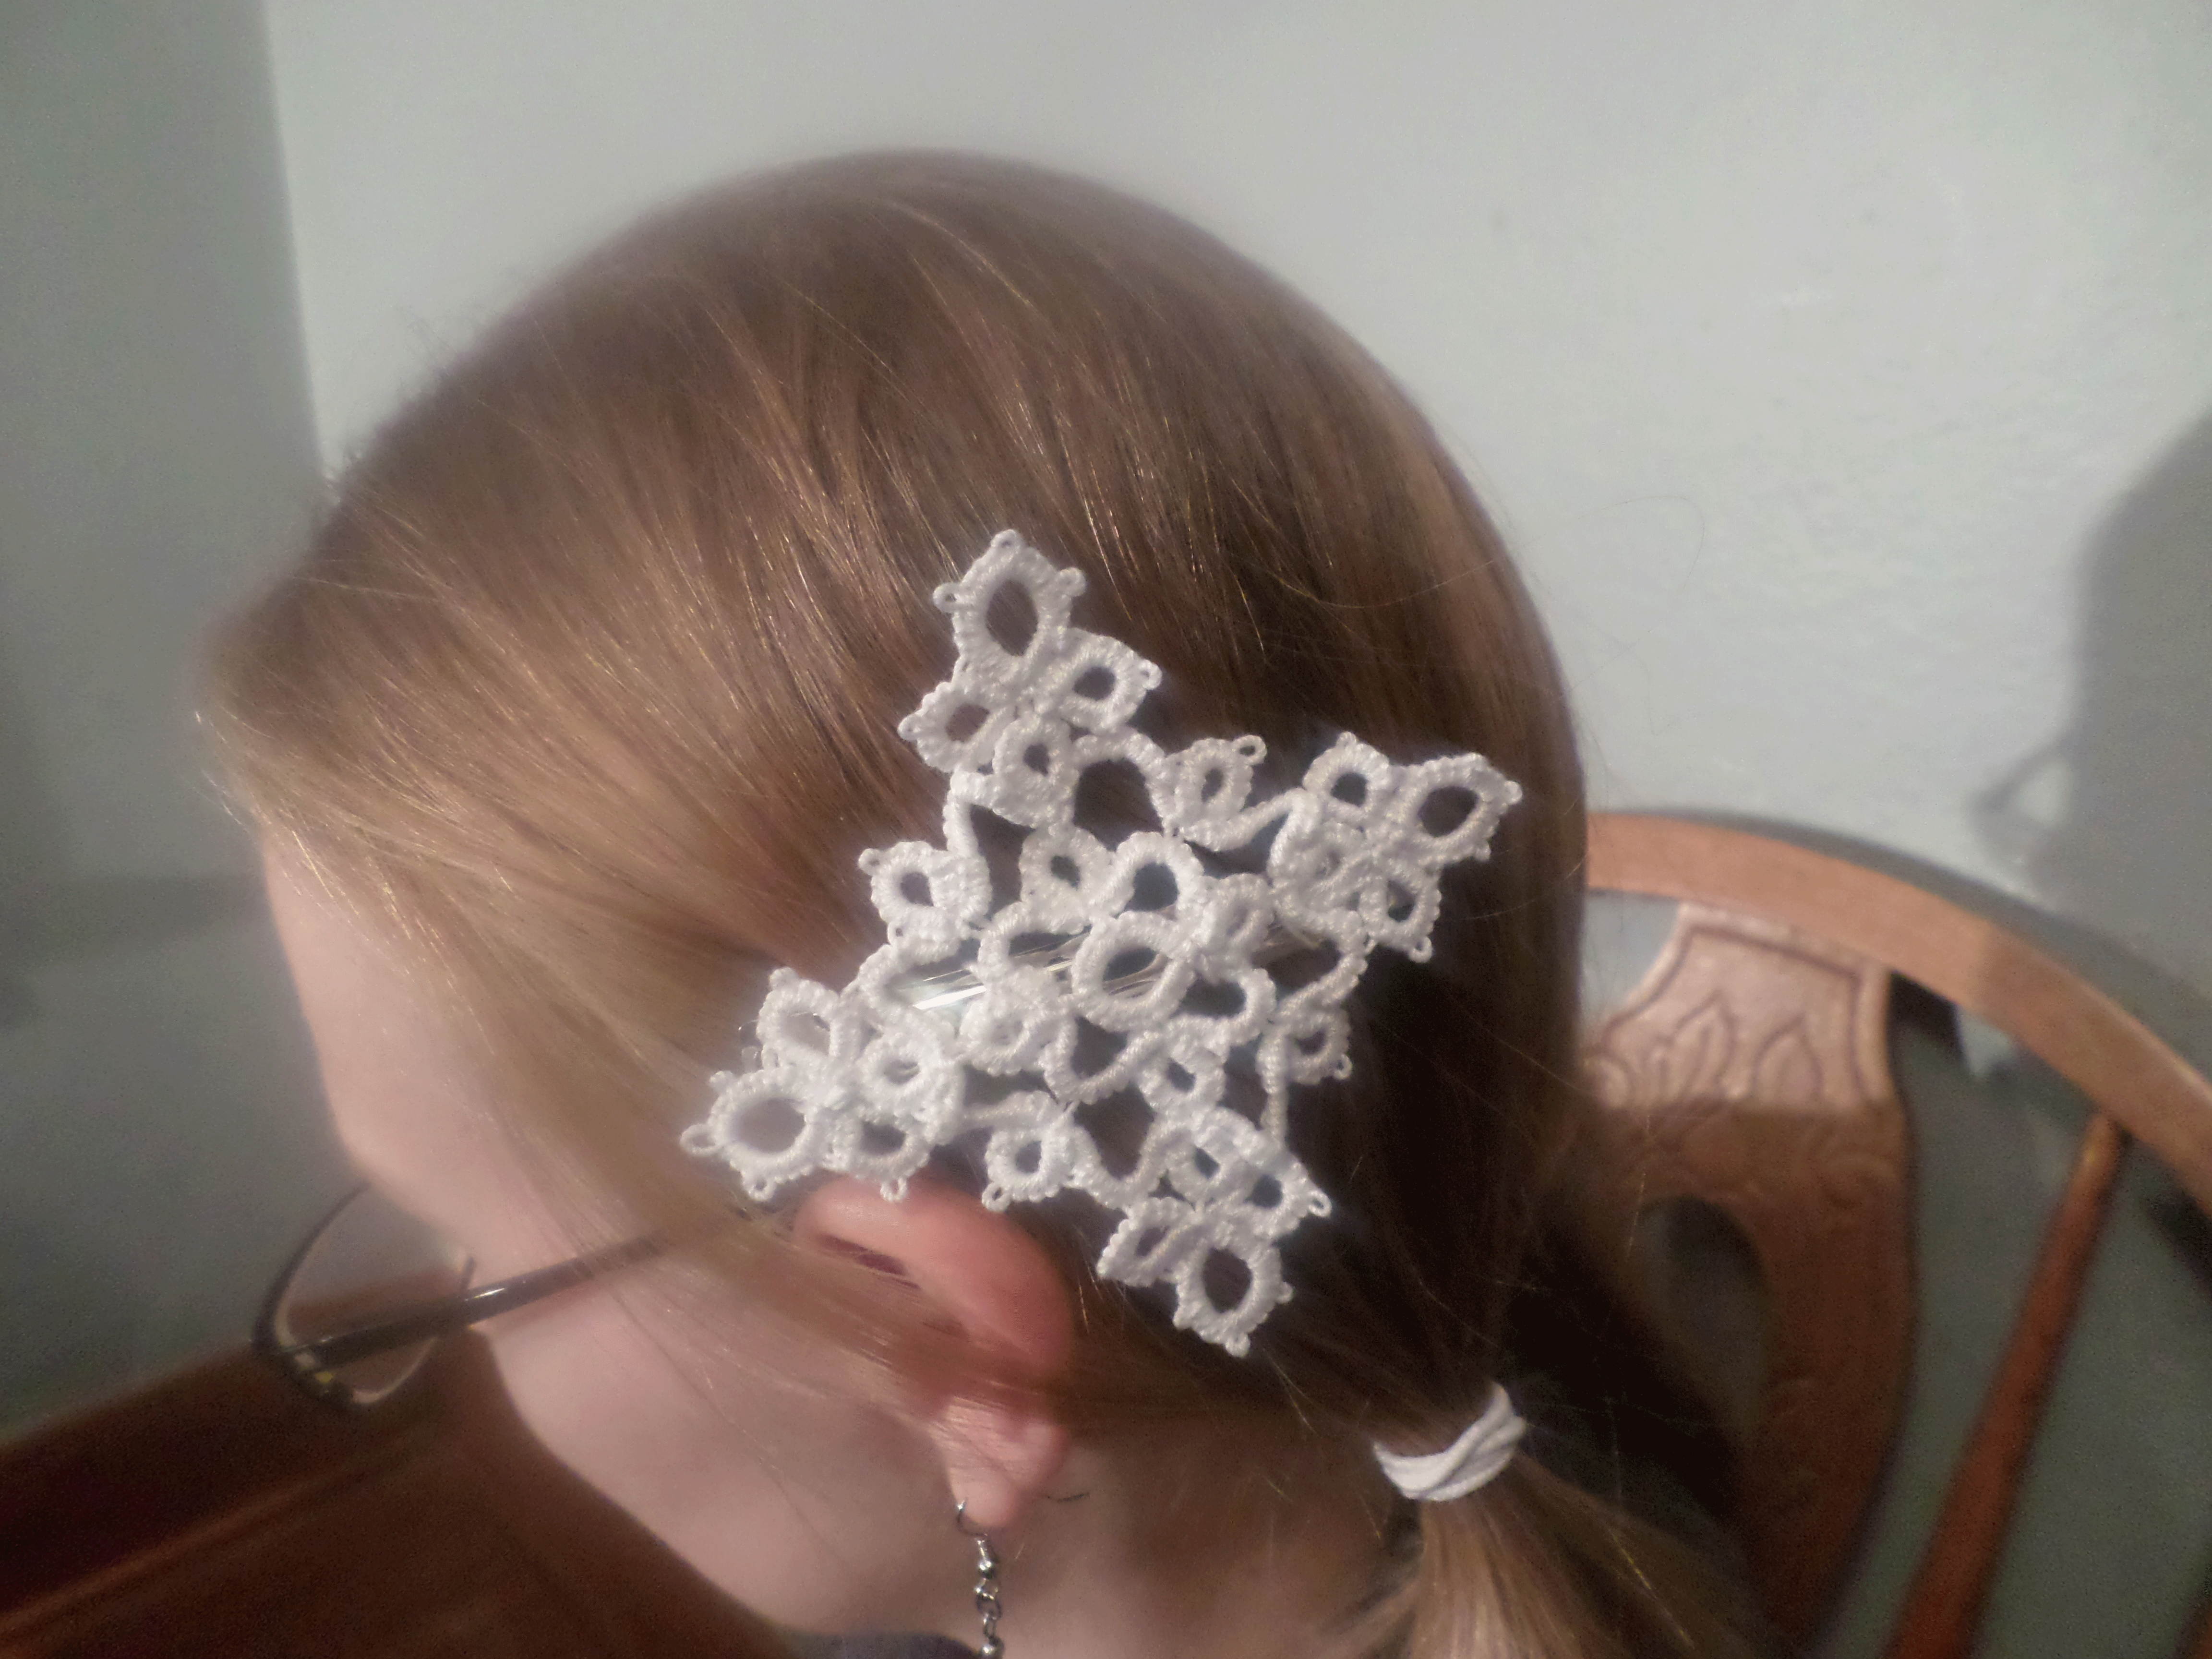 This tatting pattern makes a great hair accessory for a grown up or a little girl. Watch the needle tatting video below to see how, and you can follow along with the written tatting instructions too if that helps 🙂
 Making your own hair things is a great way to save money. What are some ways you’re planning to save money on school supplies this year?
Needle Tatting Video For Barrette Part 1
Needle Tatting Video For Barrette Part 2
Tatting Instructions
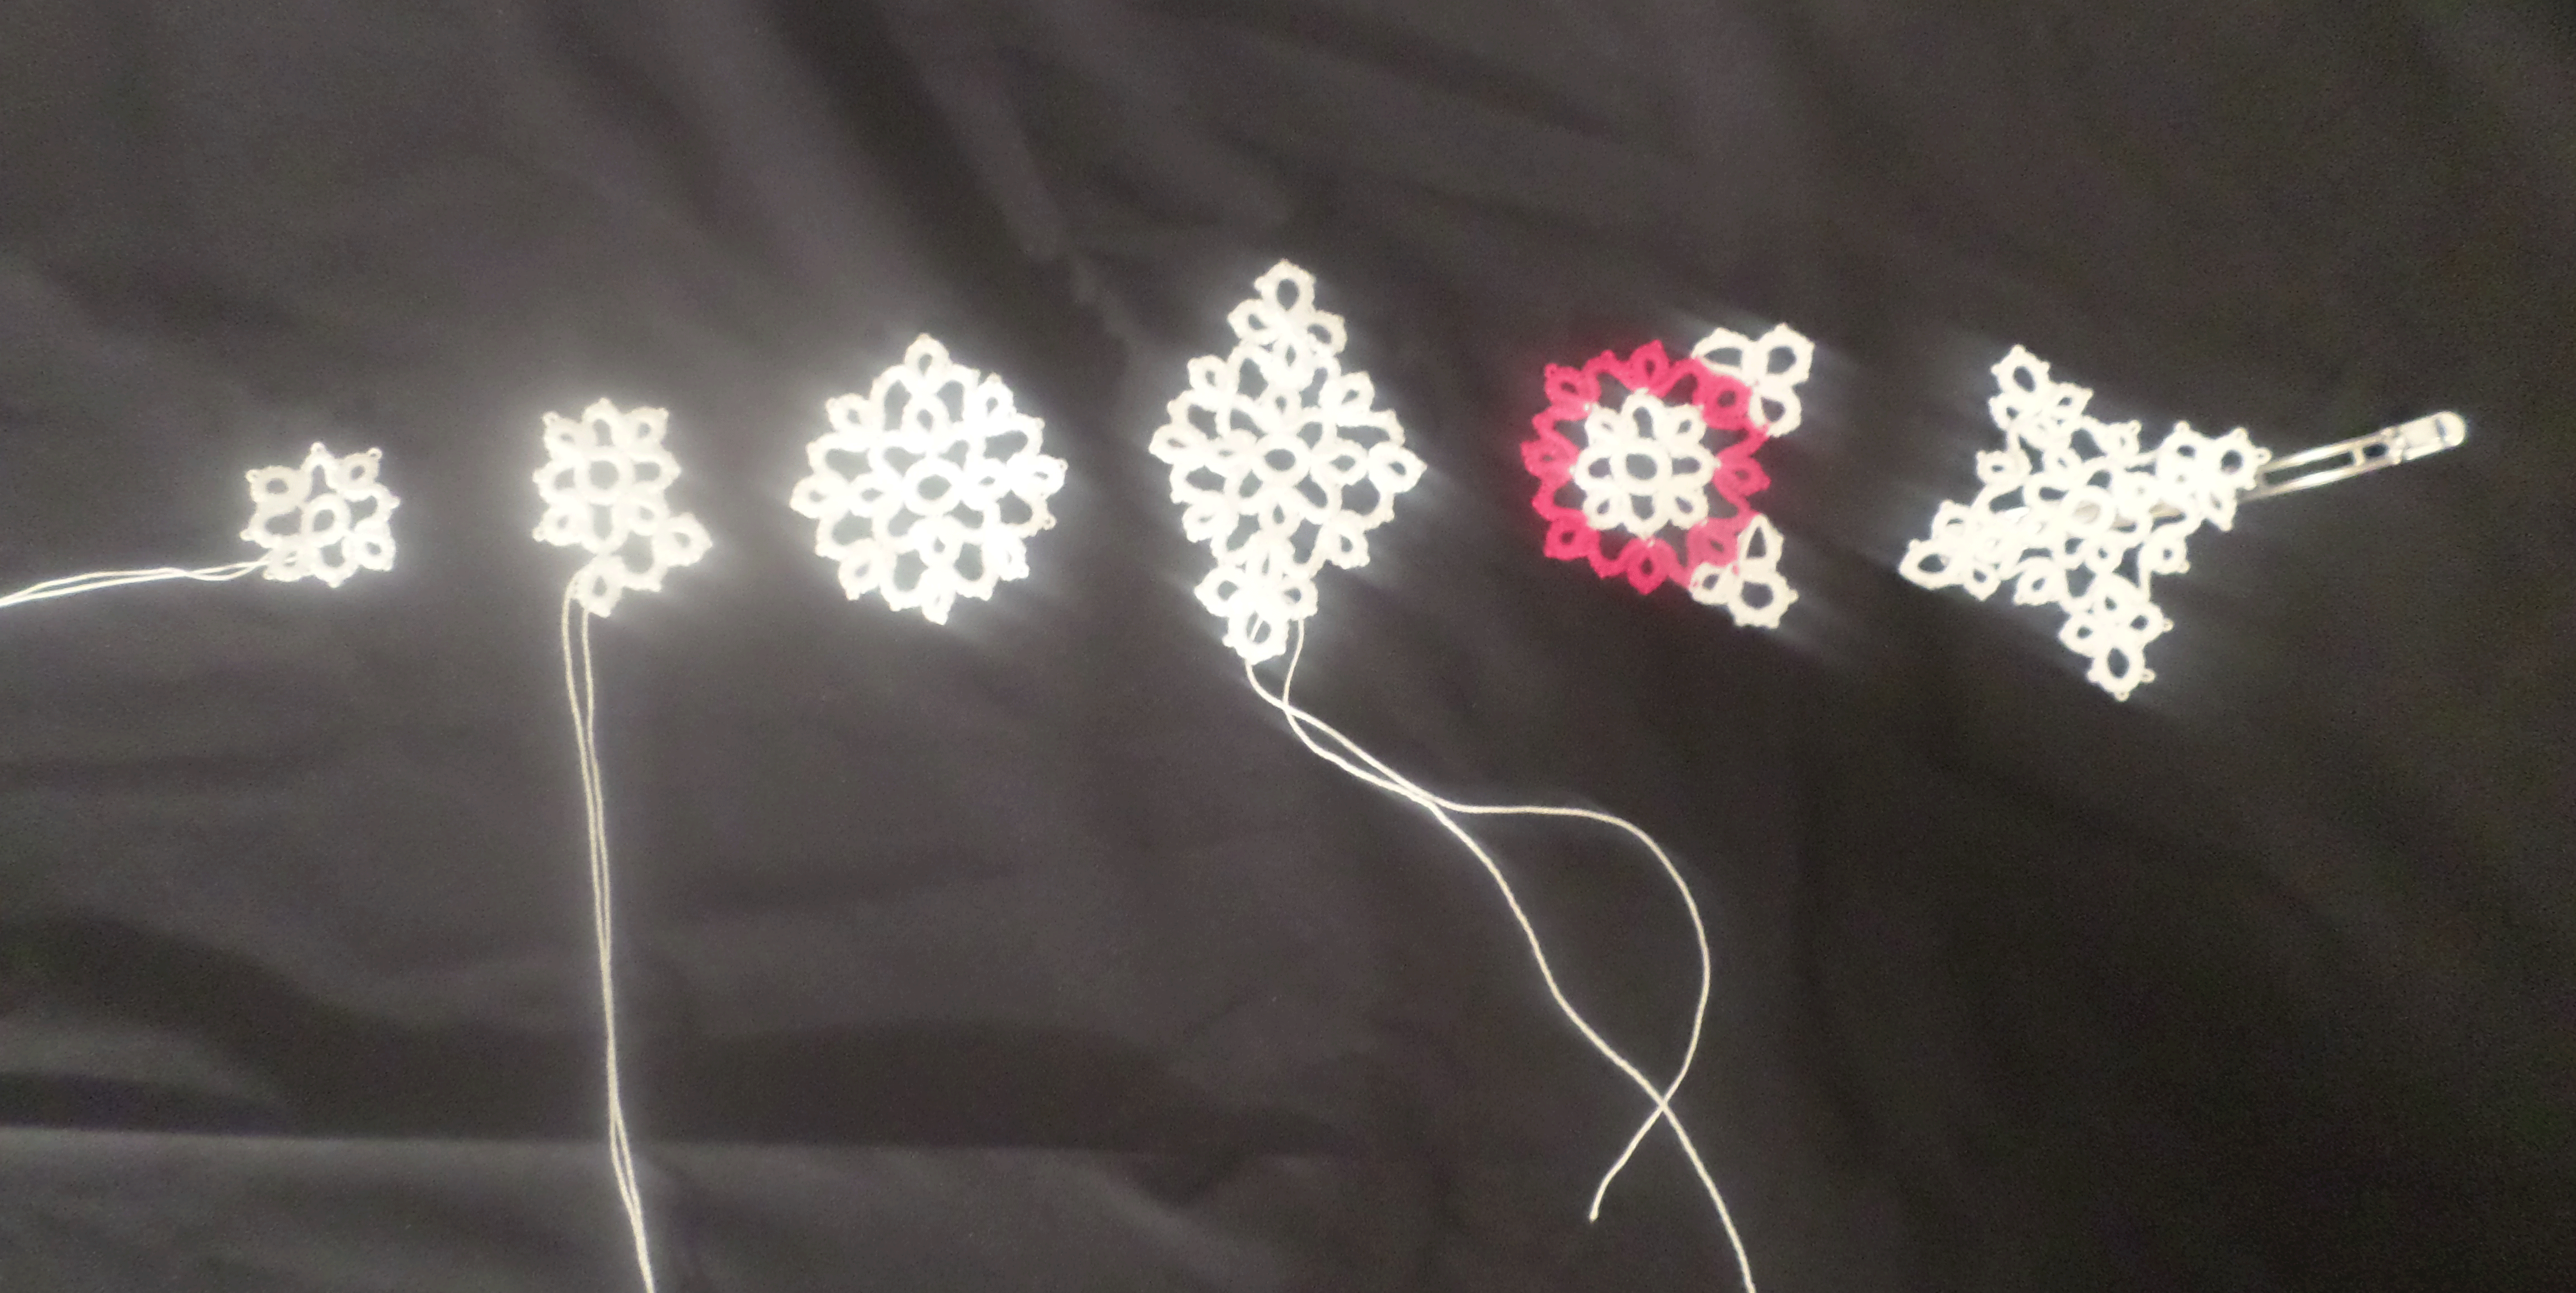
This pattern builds off of the tatted flower pattern from a previous video. Click here to watch video instructions for the center flower.
STEP 1: Make a tatted flower following the pattern listed below:
Flower Tatting Pattern
Ring 1 the center inner circle
[Ring (ic) 5,p,5,p,5,p,5 close]
5 double stitches, picot (loop), 5 double stitches, picot (loop), 5 double stitches, picot (loop), 5 double stitches, close with a knot. Turn work to flatten knot so it’s more like a square knot, then turn it back.
Outer chain and rings
[ring 3,(p),3,p,3,(p),3 close]
3 double stitches, picot (loop), 3 double stitches, picot (loop), 3 double stitches, picot (loop), 3 double stitches, close with a knot. This time loop the needle thru the back of the knot under the first ring and bring the needle towards you to make the knot.
Chain 1
3 double stitches join the picot (loop) with the third picot loop from the first ring, 3 double stitches, picot (loop), 3 double stitches, picot (loop), 3 double stitches, close with a knot made with the picot loop on the inner circle.
ring 2
[ring 3,(p),3,p,3,(p),3 close]
3 double stitches, join the last picot (loop) of the chain, 3 double stitches, picot (loop), 3 double stitches, picot (loop), 3 double stitches, close with a knot. This time loop the needle thru the back of the knot under the first ring and bring the needle towards you to make the knot.
Chain 2
3 double stitches join the picot (loop) with the third picot loop from the second ring, 3 double stitches, picot (loop), 3 double stitches, picot (loop), 3 double stitches, close with a knot made with the picot loop on the inner circle.
repeat the steps of the outer chains and rings until you have created 4 rings and 4 chains.
on the 4th chain the last picot will join into last picot of the ring
3,p,3,(p),3 close
loop needle into picot from underneath
to do this, create the chain while joining the first picot loop with the last picot loop of the ring, 3 double stiches, picot loop, 3 double stiches, then pull the needle thru without looping the thread. then pull it taunt, then you are able to turn the work and join the first loop of the very first ring, 3 double stiches, pull these off the needle. then tie a knot and loop the needle thru the bottom of the first ring.
I usually do 2 knots.
hide the ends by sewing them into the inner center ring.
STEP 2: Make the filigree border around the flower:
Pick one of the rings of the flower and loop the needle through the picot,
***(Chain 3, make a picot)x3 close the ring.
Chain 3, join to the last picot of the previous ring, (chain 3, make a picot) x2
Thread the needle through the picot loop***
Repeat *** to *** 7 times, after the first time you’ll be joining the first picot of the ring to the last picot of the chain. On the 8th time you’ll be joining into the first picot of the very first ring.
Cut and tie ends, make several knots, and hide threads.
STEP 3: The outermost ring:
***Pick one of the rings from step 2. Thread the needle through the top picot loop.
Chain 3 and join to the middle picot of the chain
(Chain 3, picot loop) x2
Close the ring,
Chain 3, join to the last picot of the previous ring
(Chain 3, picot)x4
Close the ring
Chain 3, and join to the last picot of the middle ring.
Chain 3, make a picot loop, chain 3, join to the second picot of the chain, close, tie, cut & hide***
Repeat *** to *** 3x’s to complete all 4 corners
Then attach to barrette. You can starch it if you want, you can hot glue it, or you can sew it on with the end if you didn’t cut them.
Search
