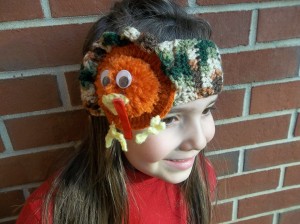
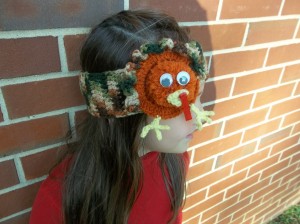
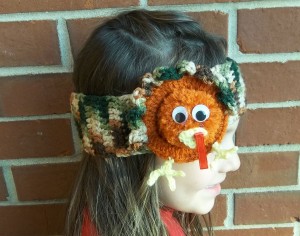
Thanksgiving Headband
Free Crochet pattern for a Thanksgiving Headband
If you’re looking for a free pattern on how to crochet a Thanksgiving Headband you’ve come to the right place. I wanted to buy my kids some adorable thanksgiving apparel, but there’s no money in the budget for that. So, I decided to see what I could muster up with my scrap yarn and decided to do a headband which can also double as an ear warmer. I encourage you to not buy yarn for this project. Everything uses very small amounts. You could even do stripes for the largest piece, the headband, if you’re afraid you don’t have enough of any one color.
I hope you have fun making this. If you have a little boy, or you don’t want the headband part you could just make the toy as a fun Thanksgiving toy. If you skip the googly eyes this could be a plastic free toy, yay!
 You will need:
-a size H crochet hook
-a hot glue gun
-3 different colors of scrap yarn
-2 googly eyes
-a piece of thin red ribbon.
-a pompom maker or a small piece of cardboard, or a large pompom
Thanksgiving Headband Part 1
Thanksgiving Headband Part 2
Headband Pattern
Chain 12, turn project, skip 2 spaces, and double crochet in each of the next 10 spaces. (chain 2, turn project and dc in each of the next 10 spaces) repeat until long enough to wrap around your child’s head. Cut with extra thread to “sew” the two ends together. Cut and hide thread.
Turkey Body
With orange yarn (or whatever color) Chain 6, join loop with a slip stitch.
Round 1
Chain 2, Crochet 2DC in each chain all the way around (12 DC total) then join with a slip stitch.
Round 2
Chain 2, 2DC in each space all the way around (24 total dc) then join with a slip stitch.
Round 3
Chain 2, 2DC in each space all the way around (48 total dc) then join with a slip stitch.
 Turkey Feathers
Switch color to variegated yarn, chain 2 (3 triple crochet in next space, slip stitch in each of the next 2 spaces, chain 2) repeat 8 x’s, 3 TC in next space, slip stich in next space. Tie off and hide the thread.
Turkey Head
Make a large pompom to match the Turkey body, or you can use a large store bought pompom.
Turkey Feet
Connect yellow thread to wherever you want the foot to be.
Chain 8, skip 1st space and slip stitch in the next 4 spaces, (chain 5, skip first space and slip stitch in the next 4 spaces) x2, slip stitch in next 3 spaces, tie of and hide the thread.
Fold the bird in half so that you can space the next foot evenly and then repeat the Turkey feet steps.
Turkey Beak
Chain 3, join to first one with a slip stitch.
Chain 1, turn project, 2sc, 1 slip stitch.
Chain 1, turn project, 2 sc in each of the 3 spaces.
 Finishing steps
Glue the turkey head onto the turkey body. Glue the eyes and beak onto the head. Glue the gizzard onto the beak. Glue the turkey onto the headband so that it covers up the seam. Please tell me how your turkey turns out.
 Modern Homemakers


