Irrigation for Raised Bed Gardening
This past summer my husband and I built raised beds in an effort to eat more organic, local veggies (I mean how much more local can you get than your backyard?). The first step was creating the frames for the beds, second step was the soil (more on that in another post), and the last step was planting our seeds. Next came watering. My type A (capitalized for emphasis) husband became determined to find a way to create an easy watering system. For weeks he watched hours of YouTube videos and read long boring articles online. Since he spent so many hours researching we thought we would share our solution. ** Note: we are NOT expert gardeners, but are sharing our gardening experience with others on a similar journey.
The principal is simple: water flowing from larger pipes to smaller pipes with the versatility to turn on or off any combination of beds and/or individual rows. The first step was to analyze and study how each plant needed to be watered manually. While doing so we concluded that there are three basic watering techniques required that we would need to simulate.
Mist
Soak
Spray
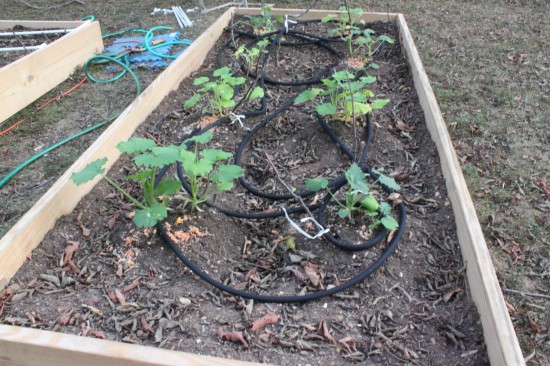
The first of many failed attempts started with soaker hoses (see image below). This was an epic fail. My husband almost got voted off the island for this one. We found that this effort watered all of the areas we didn’t need and didn’t water what we DID need. It was a waste of water and time.
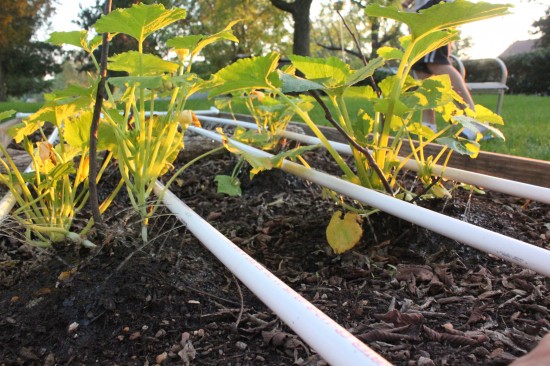
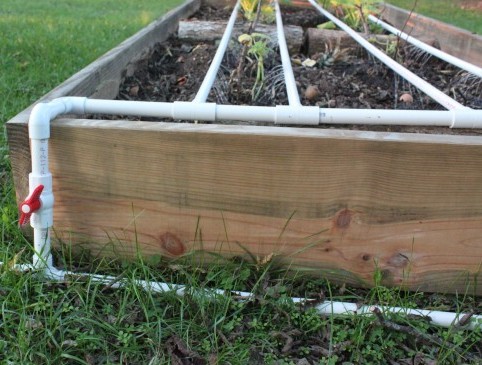
In turning to YouTube we found other people had luck with PVC pipes, refrigerator supply lines, milk jugs, and other various things. Each of these ideas were assimilated into a method that met our project requirements: which were ease of use, efficiency of time each day, and maximization of water per square foot. Quickly it became apparent that the smallest hole possible alternating 10 degrees in both directions from absolute center running lengthwise down the ½ inch pipe would yield the highest pressure output. Using ¾ inch trunk line with reducing T joints the output pressure was further maximized across 6 or more rows. Since each pipe can serve two rows (one in each direction of absolute center) this system can easily sustain 12 or more rows with a standard house garden hose without a pump. No glue is needed. This also allows the system to be dismantled and reconfigured for multiple garden layouts.
Reason why we didn’t go with a fancy expensive solution:
Other systems available that cost many hundreds of dollars more have specialized pipes, fittings, and filters that can clog up and stop working. With the PVC pipe and 1/16 of an inch holes, clogging will rarely, if ever be a problem. And if clogging does become a problem, you are only out a few dollars or you can shake out the sediment.
Parts list:
¾ inch PVC pipe (buy in 10 ft. sections for 10 ft long raised beds, 8 ft. for 8 ft raised beds, etc) You will only need one of these per bed.
½ inch PVC pipe (three per bed for a 10 ft bed for an example giving you approx. six pipes watering 12 rows)
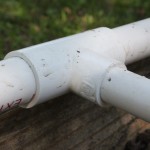 (six) reducing T joints (reduces from ¾ inch to ½ inch)
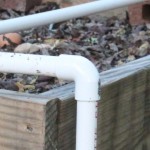 (one) ¾ inch 90 degree elbow joint
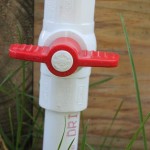 (one) ¾ inch shut off valve (value added benefit of giving you variable pressure)
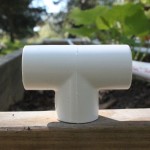 (one) ¾ inch T joint for connecting the source line between raised beds
(one) threaded PVC connector for hose connection
 (one) 3/4 inch end cap
(six) 1/2 inch end caps
Tools Needed:
- drill
- 1/16 inch drill bit (buy several because they break easily)
- pipe cutter or saw
Time to create:
It will probably take you 4 -5 hours to create the irrigation for one bed. If you experiment it make take a few days. Once we got the system down the final bed only took a couple of hours. The experimentation is what takes so long.
Considerations:
The design is flexible to have greenhouses to be built on top of the irrigation system.
Areas for improvement:
Rain barrel implementation
Auto timer that switches between beds automatically drawing water from rain barrel supply.
So long are the days we have to lug the long garden hose around and spray each bed manually. YAHOO! Snaps for my husband for finding an irrigation solution for our raised bed garden.
This post was co-written with my husband; a designer, computer programmer and teacher by day and garden efficiency engineer by night. Here is an in-depth video he created about the system.
If you have a garden, how do you handle watering?
 Modern Homemakers


Holy cow! You guys took this project to a “whole notha level”. If/When we get a house we will totally being using this tutorial. I’m SO JEALOUS of your raised garden. I’m looking forward to eating from it this Christmas.
I’m so excited about you coming over and doing this to my raised beds… hint hint! I’m willing to pay you in Jessica Seinfeld’s oatmeal/zucchini/banana cookies I just made!
Looks great. Picked up the supplies today and have it partially assembled. Just guessing on where to drill the holes so have done one pipe and will give it a trial run..
Thanks for all the information…
How exciting! Please share some pictures on our facebook page when you get finished we’d love to see them!
Love the concept! I have four 10ft raised beds in my yard. Using this system, can you water all the beds at the same time? Or does the water pressure weaken?
Thanks
It does reduce it a little but it’s still strong enough to do the job and you can choose how many beds you want to water at any given time 🙂
Can you run both beds at the same time off on garden hose?
I have a 8×4 bed and a 4×12 bed I want to be able to have engough pressure to run both has anyone tried that yet? Off of one line
I would run the reused fence baords thru a planer with vacuum attachment) to remove all that stuff before using them. I would not sand it all off, it would get too messy and create lots of dust. Of course, do the best you can do to start growing. IF you dont have a planer, then try to find reused baords that have no coatings. Fence baords cost about $2 each at the hardware store, so they are not too expensive anyway, get them if you are really concerned.
Taking the time to do that would definitely make them look nicer 🙂
I just did this for my three beds. I put the two 6×3’ beds on one hose and the 6×4’ on another. I was running soaker hoses in each bed for an hour. Now I have the two connected beds on for 30 minutes and the bigger bed for 30 minutes. That means I’m watering for an hour rather than three. Thank you for posting this. I’m showing everyone I know the photos and one friend wants to do it with his beds.